Remix IDE
Create, deploy and interact with your Smart Contract using REMIX IDE.
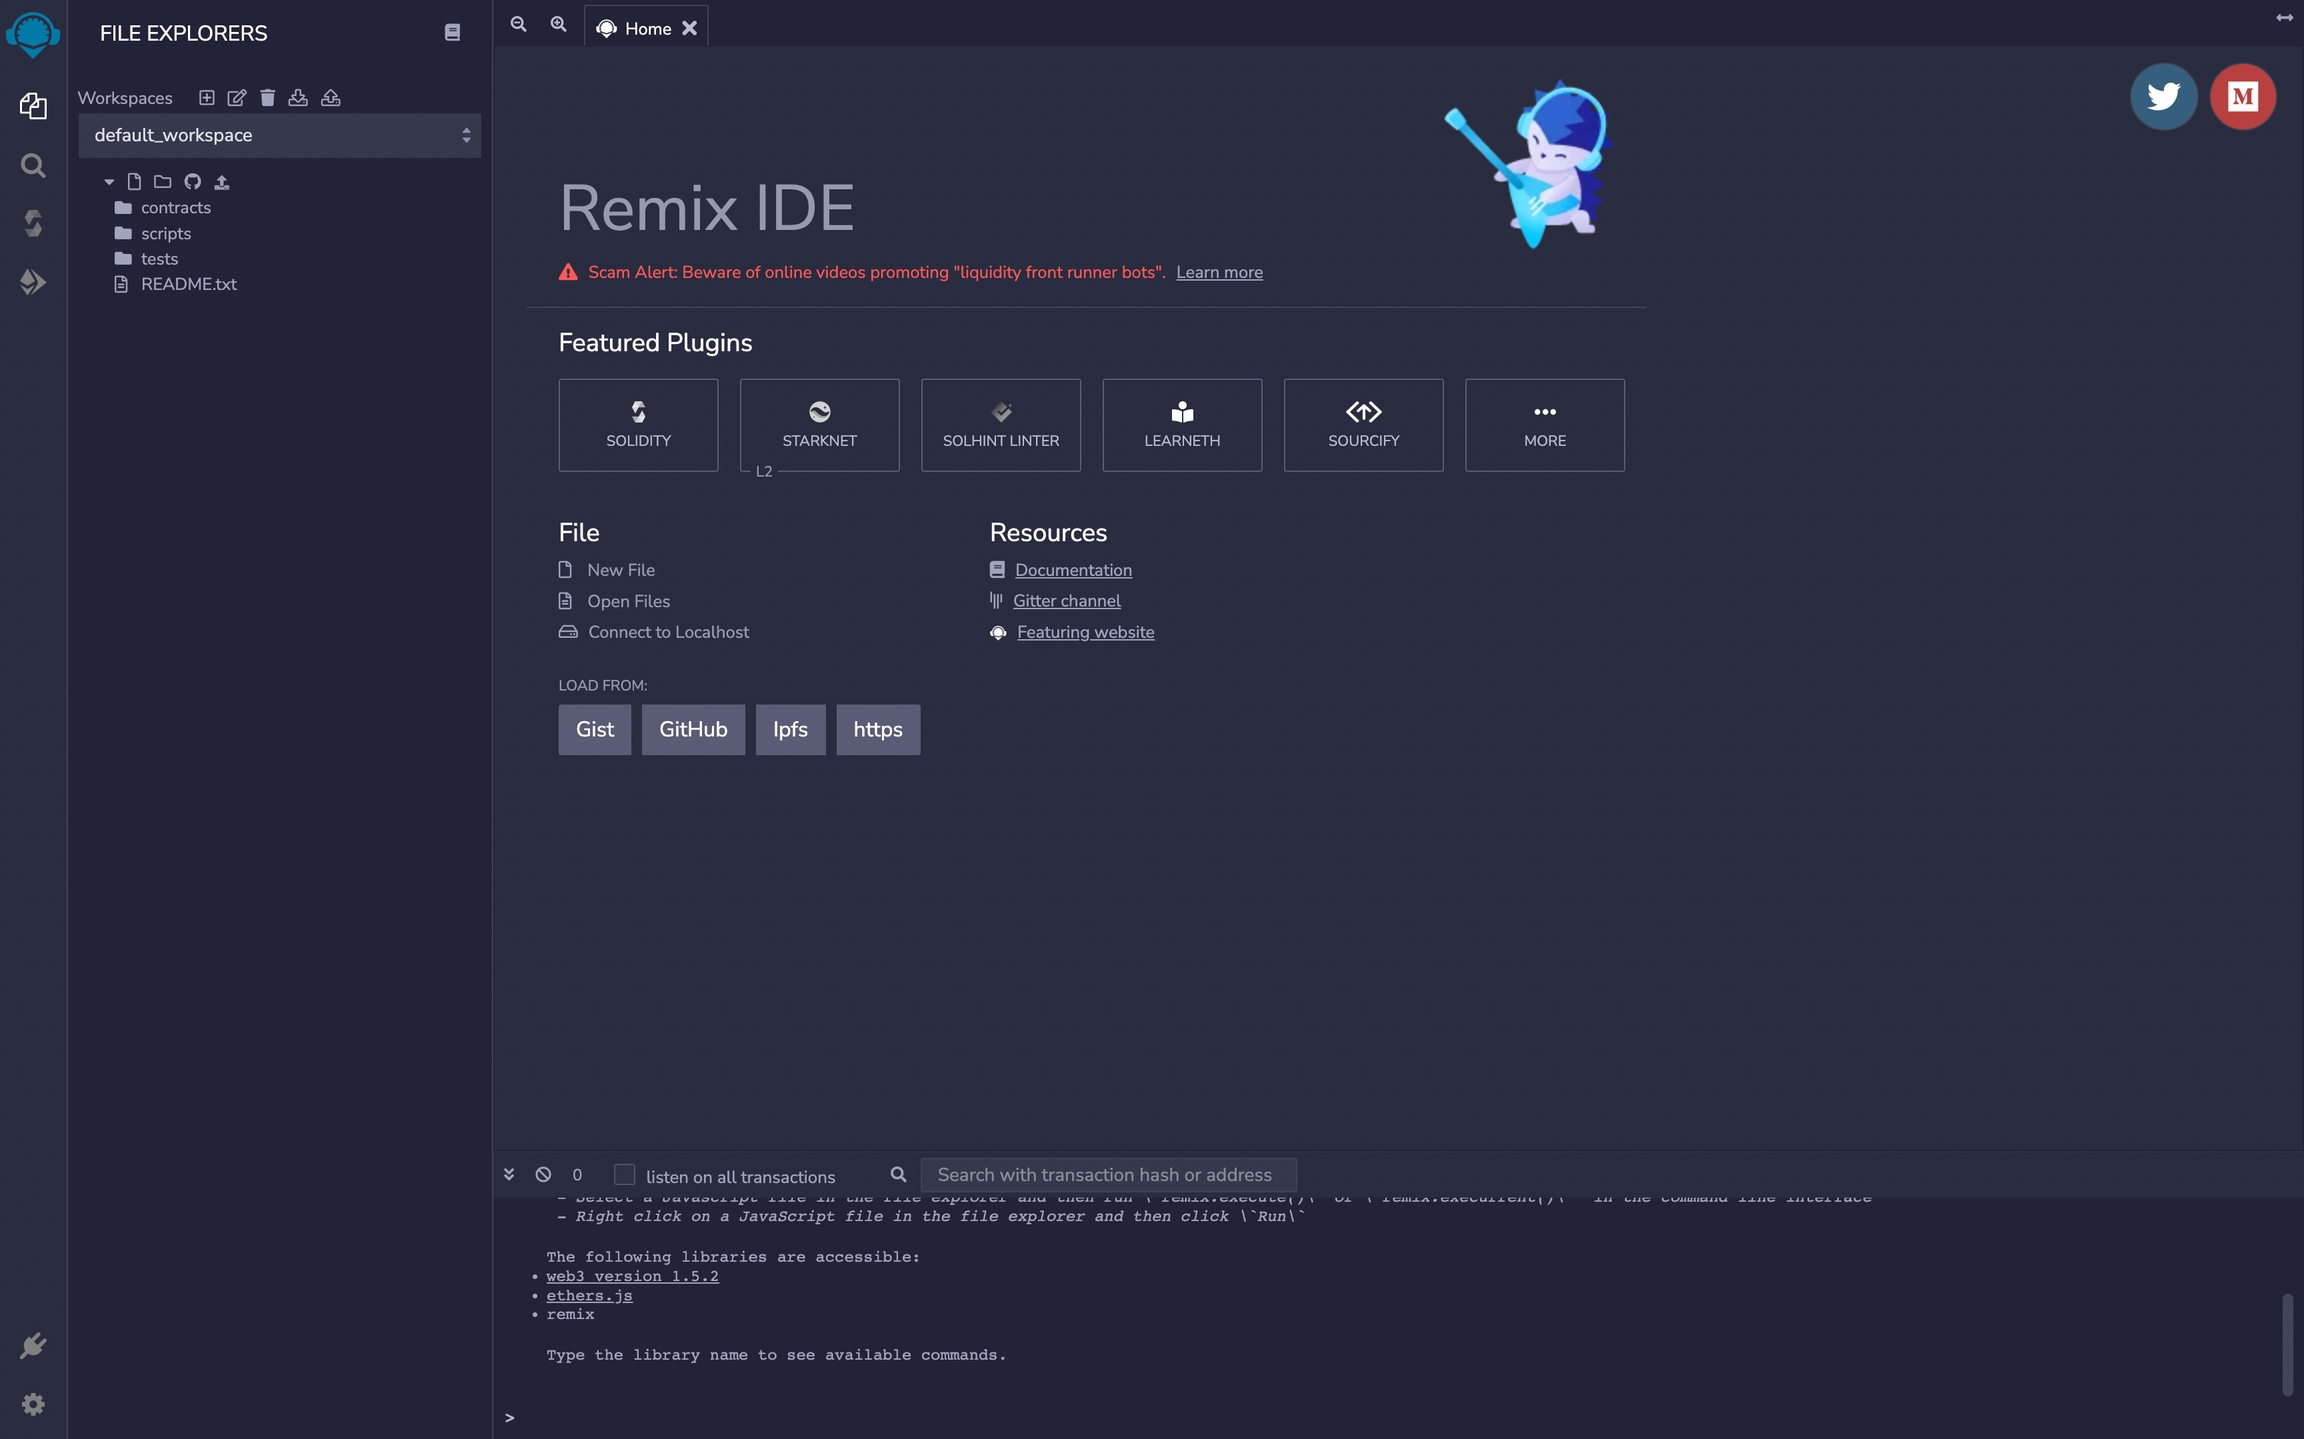
Go to https://remix.ethereum.org/
Select the default workspace.
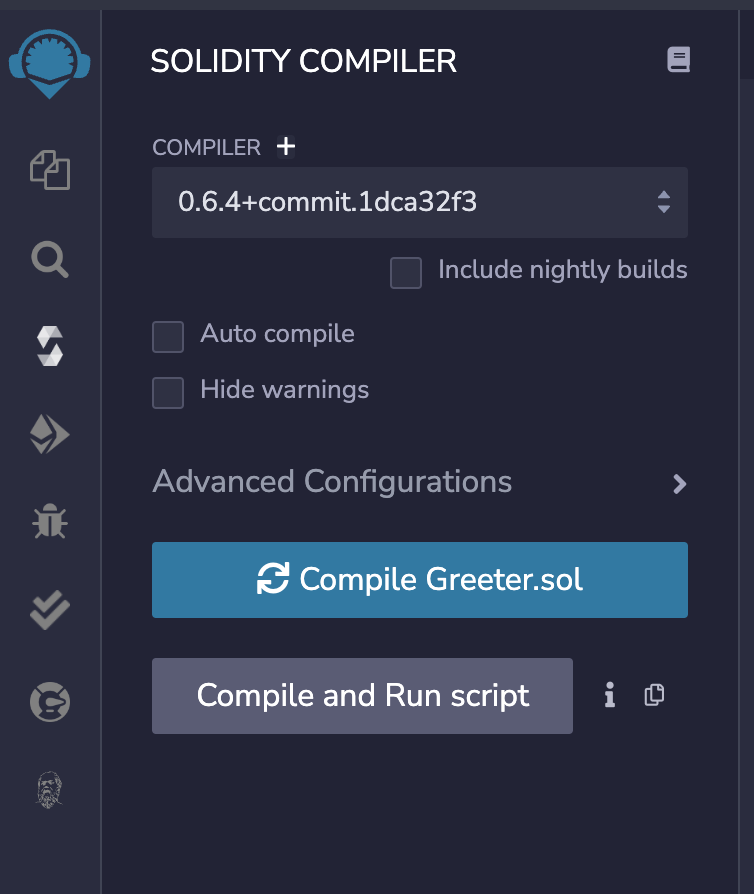
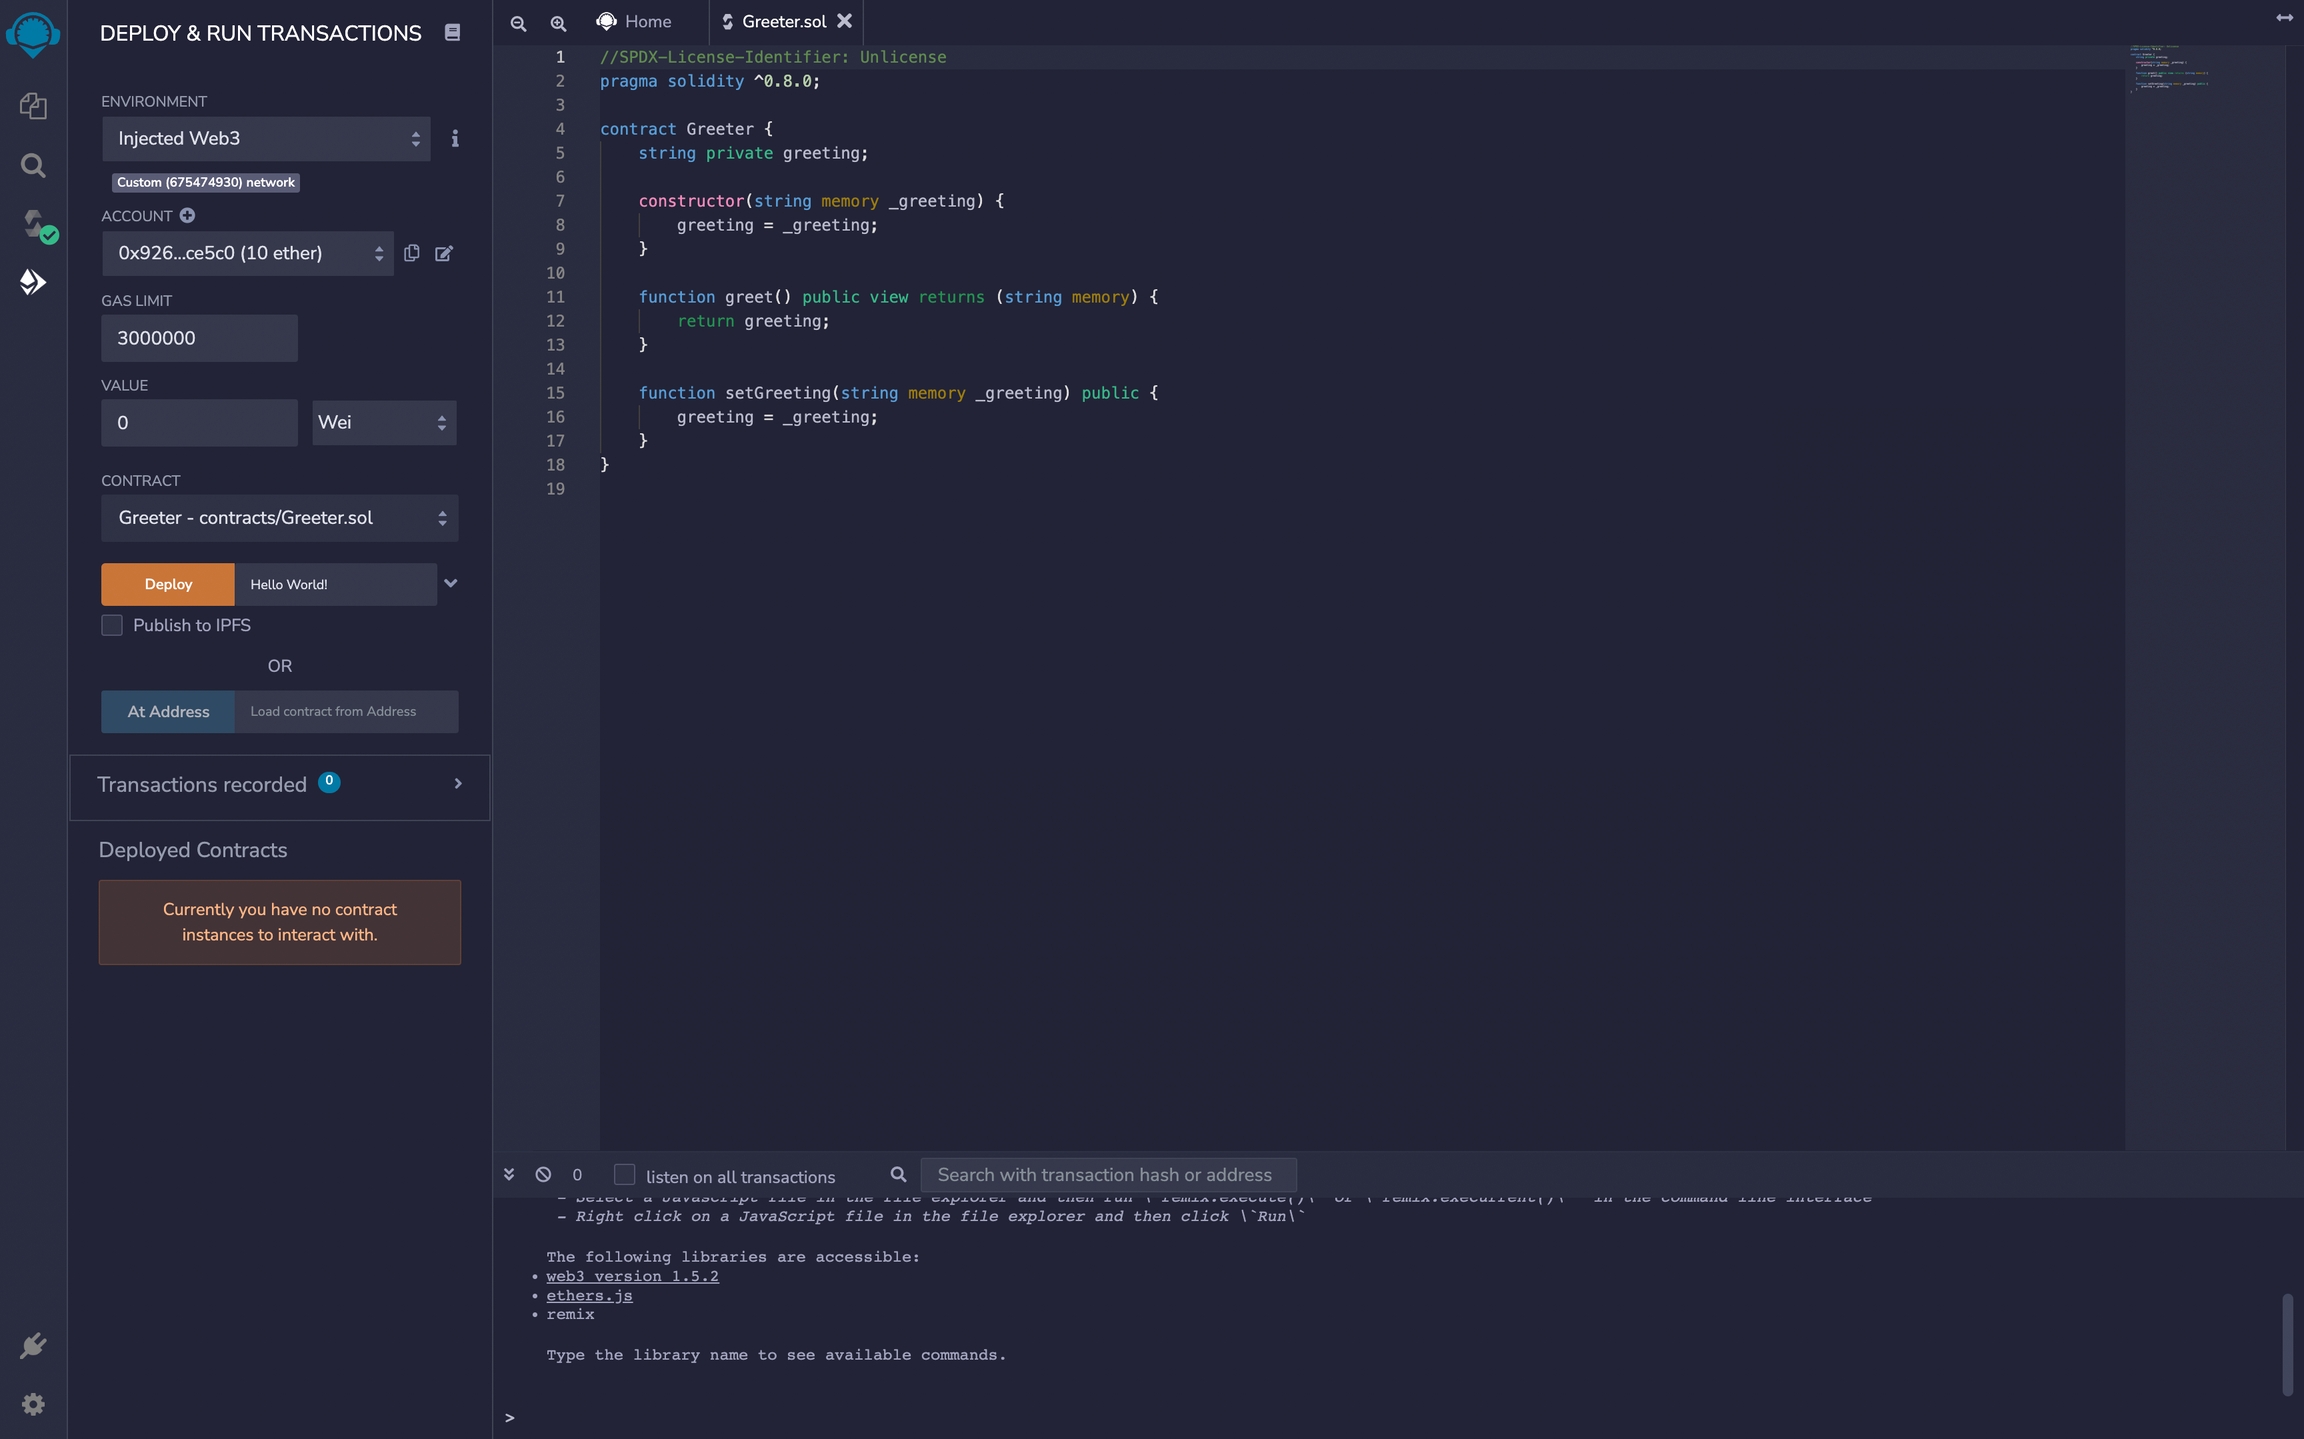
In the contract folder, you find the sample contracts that can be deployed. You can choose to write a new one from scratch or import one. For this tutorial, we import the Greeter.sol contract used in the Hardhat example.
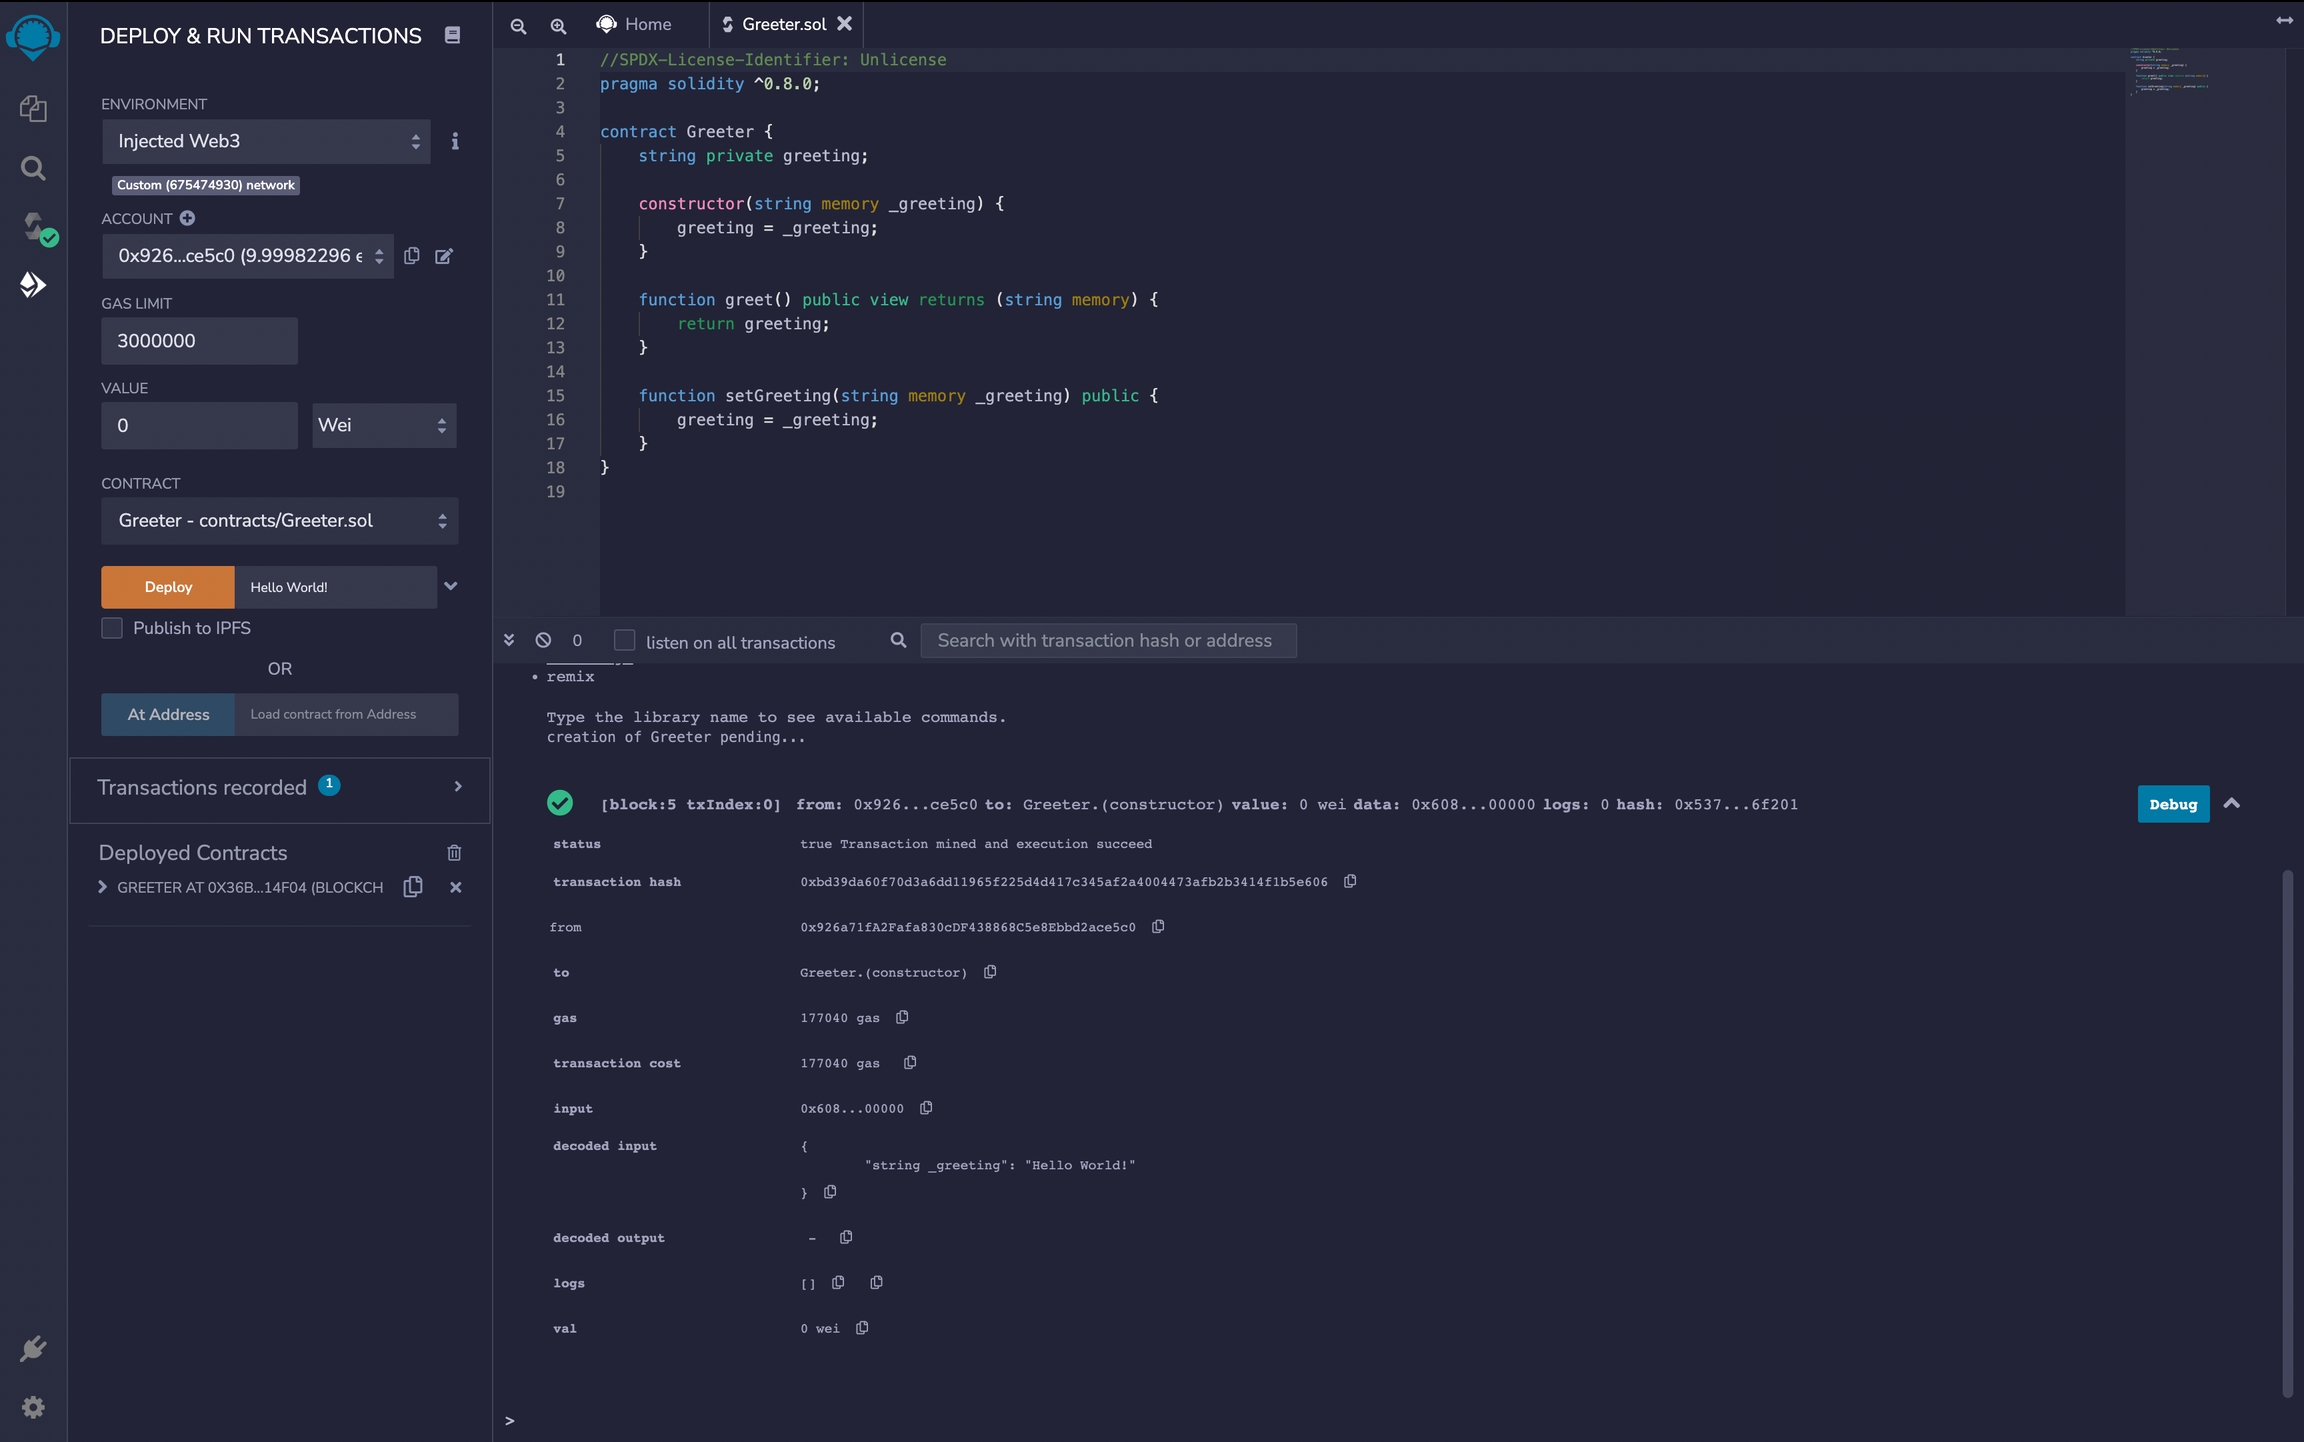
Select the contract you want to deploy, go to the compilation tab (third from the top), choose the compiler version and click compile.
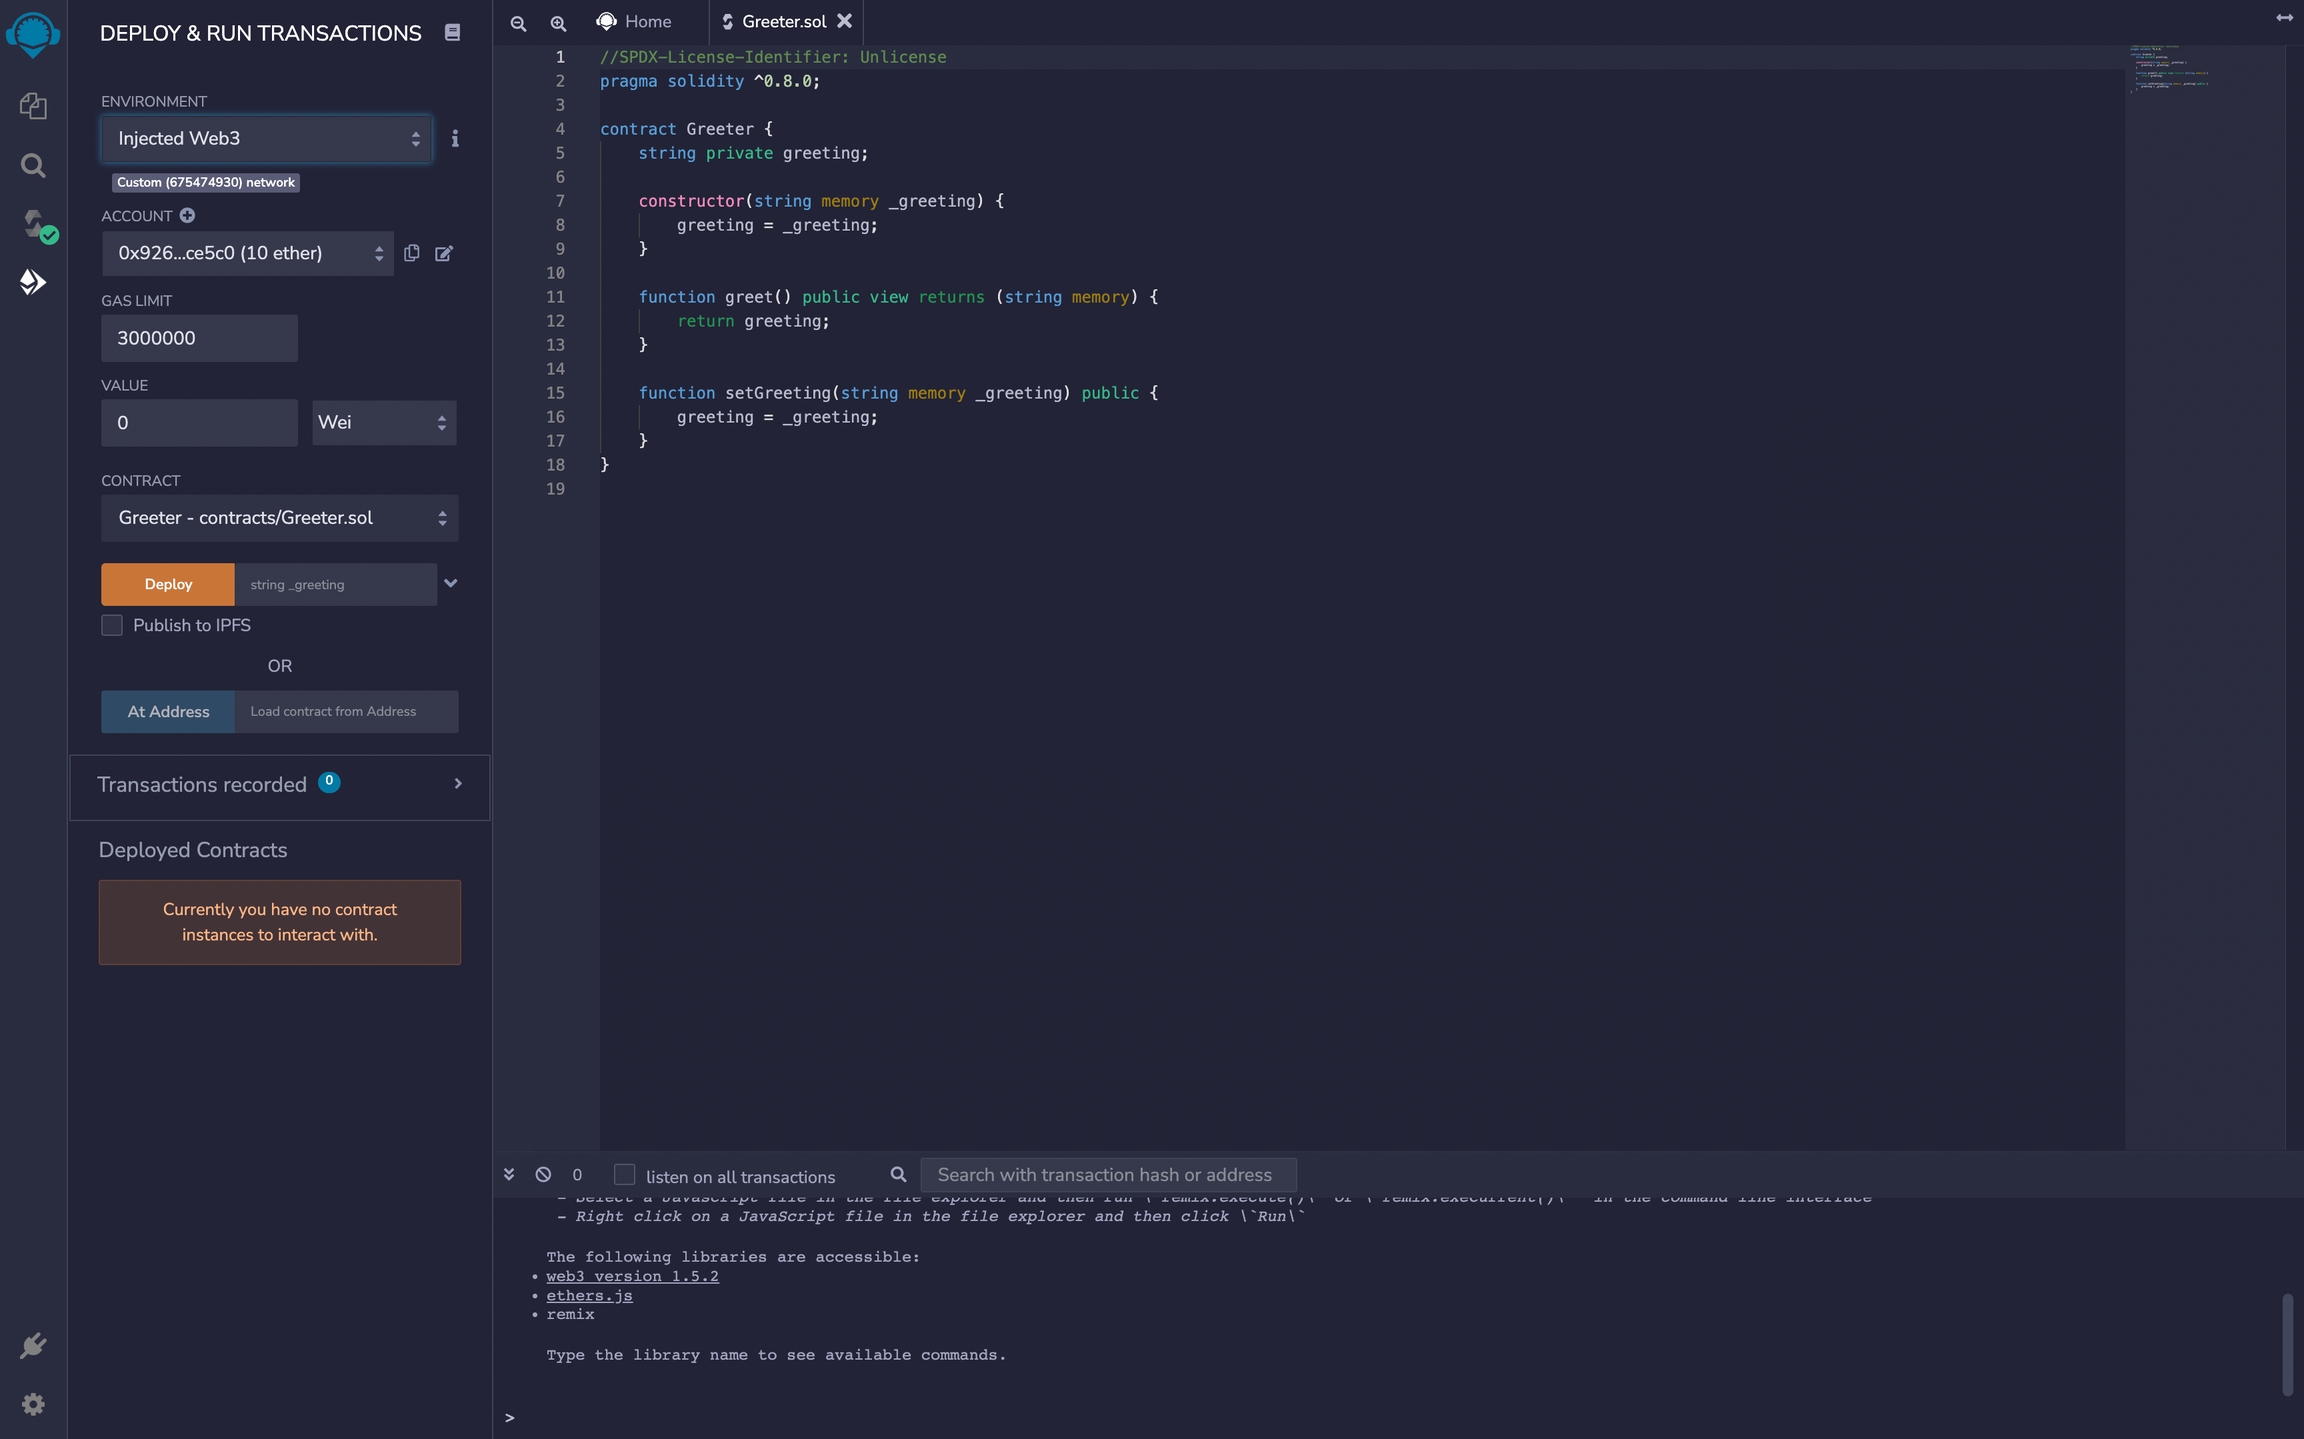
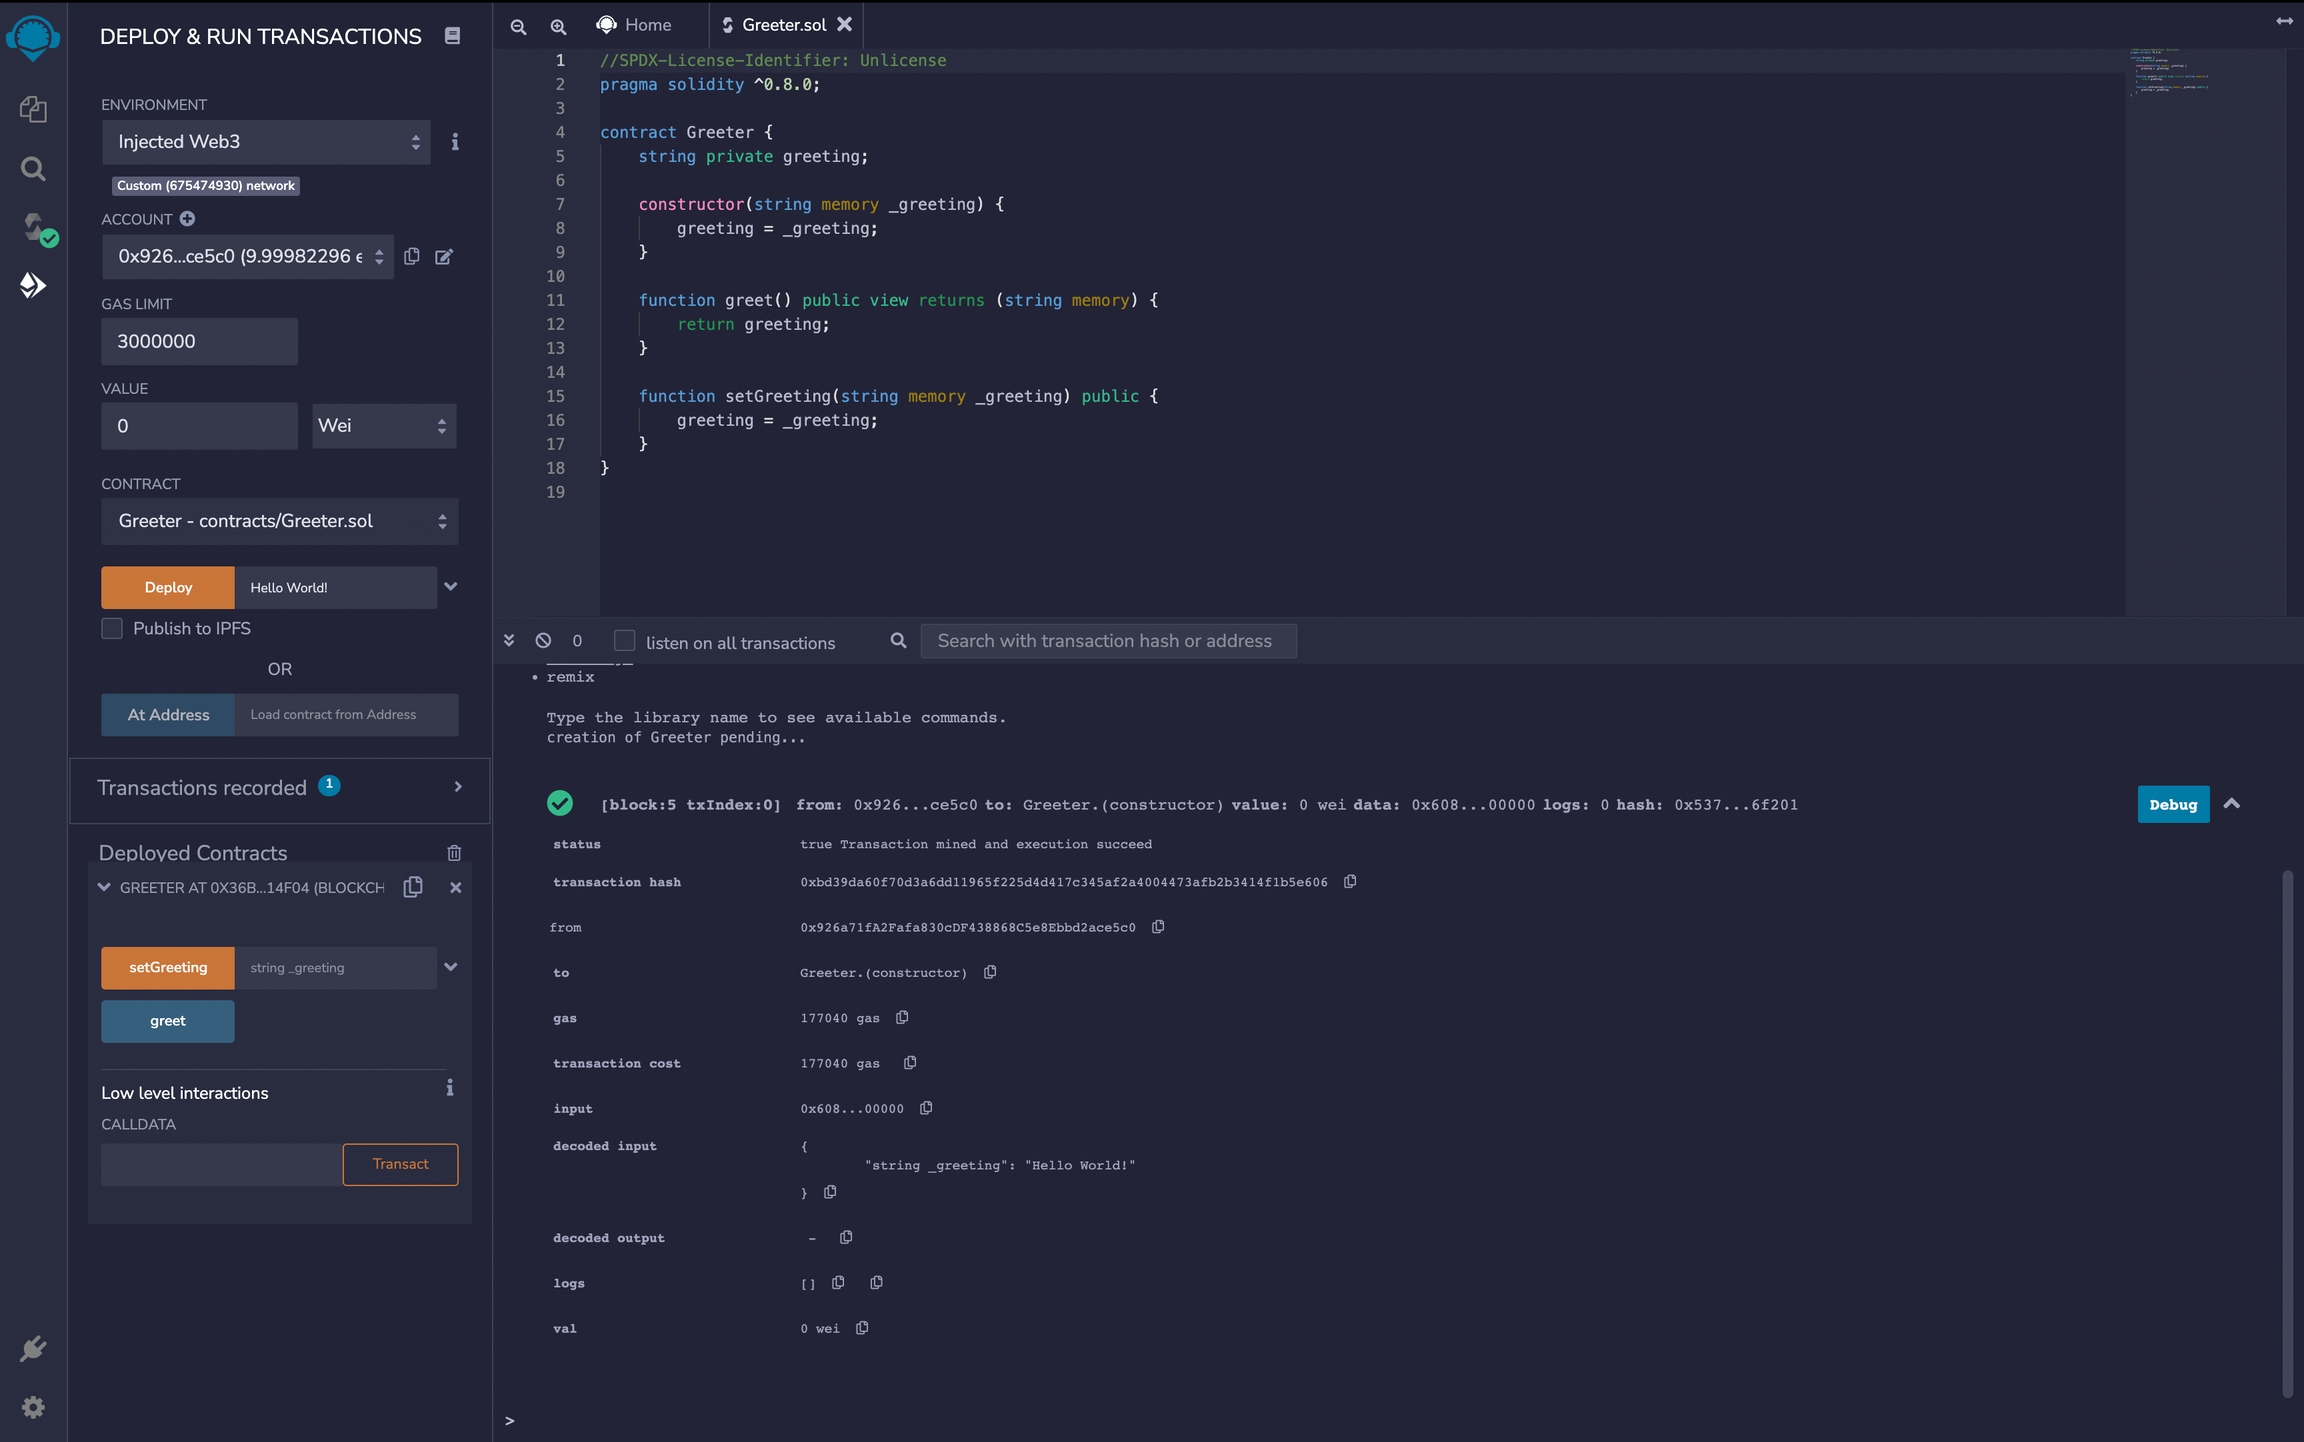
Go to the deployment page (fourth from the top) and select Injected web3 from the environment tab.
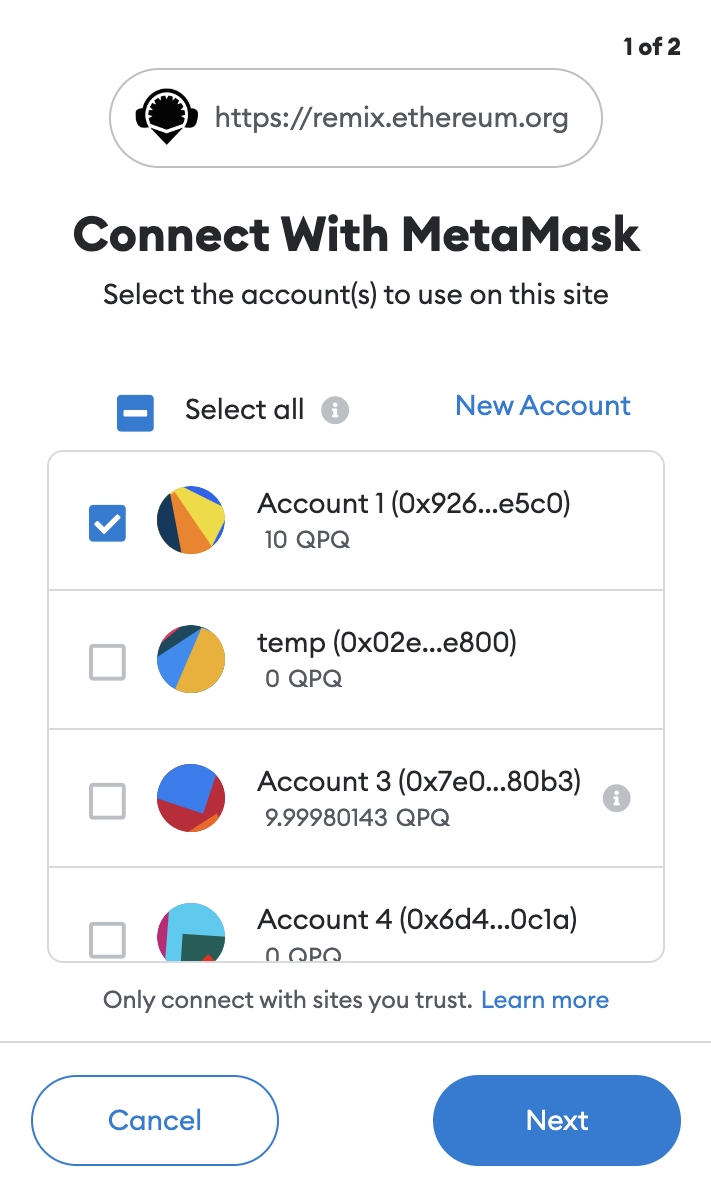
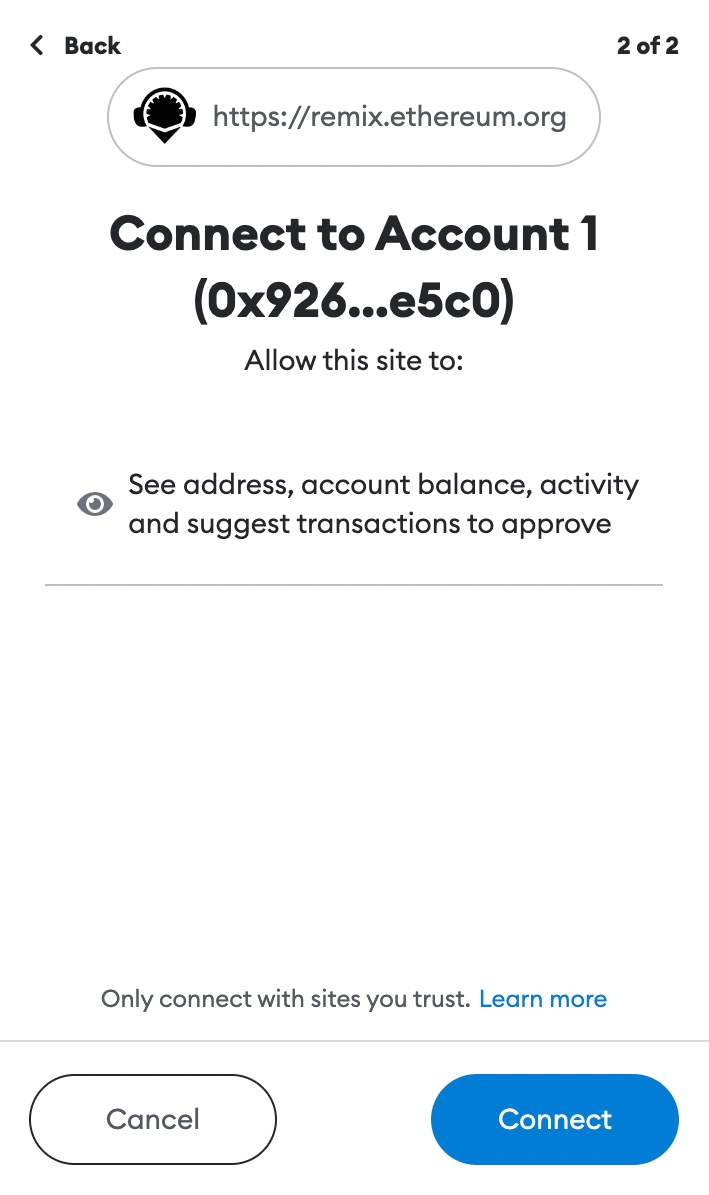
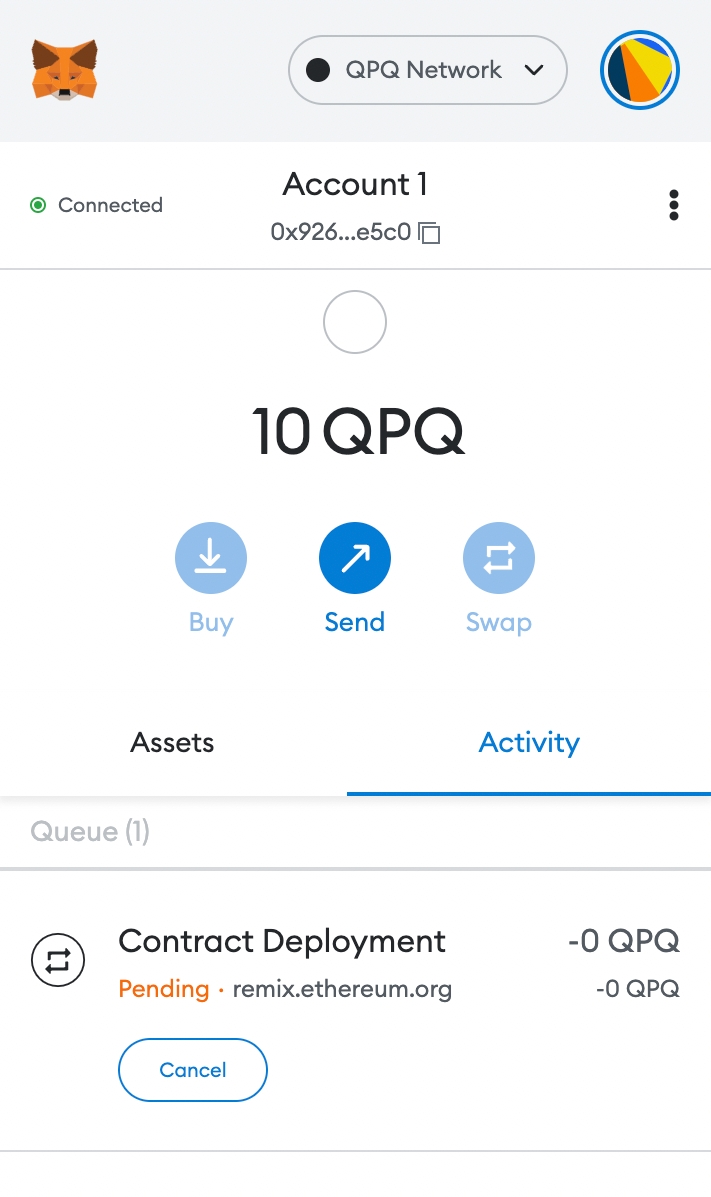
Then, Metamask asks for the connection with the account you want to use for the deployment.
Add the parameter "hello world" from the deployment page for the Greeter.sol contract and click the deploy button.
Different types of smart contracts may require other parameters or even none!
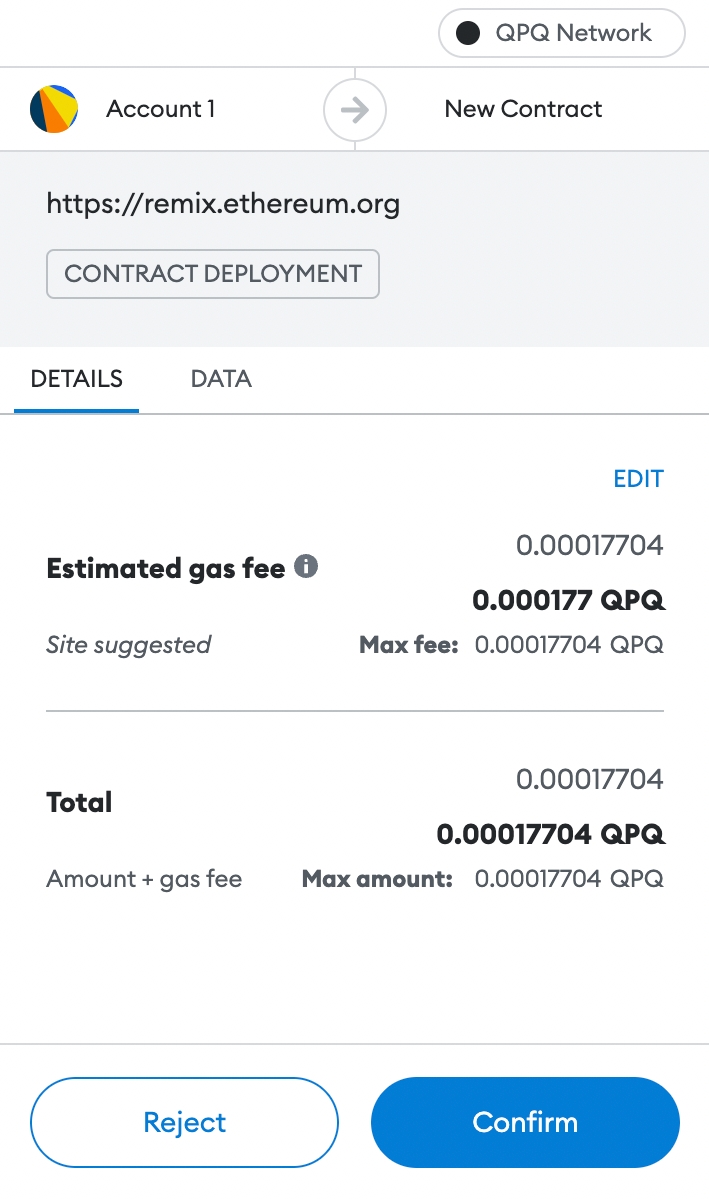
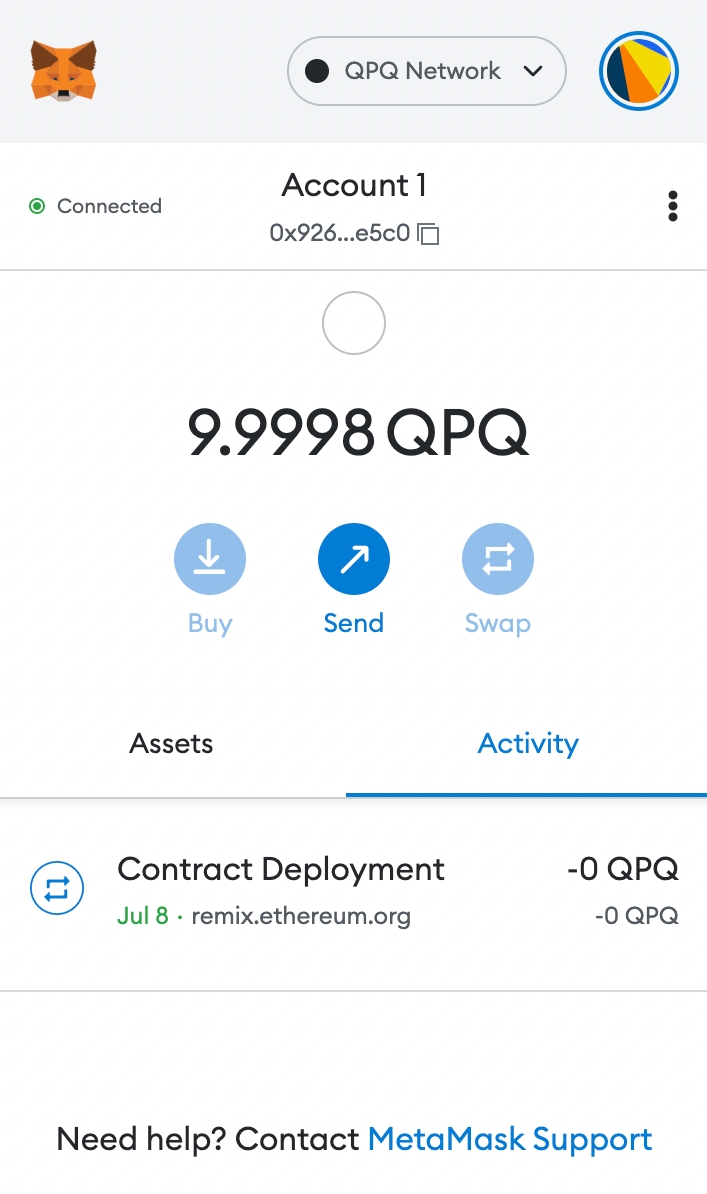
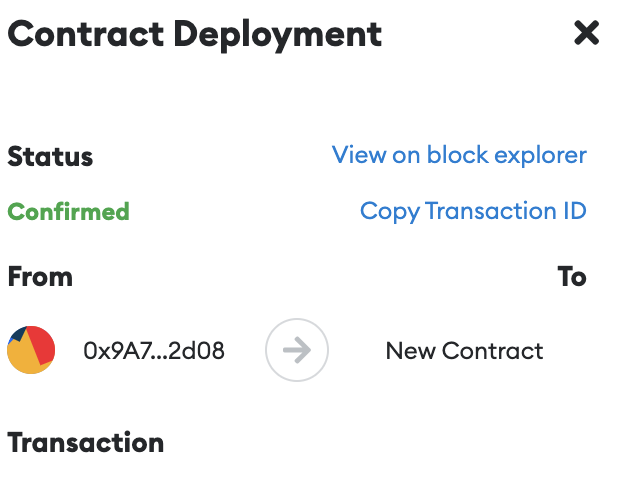
Confirm the transaction from Metamask and wait for confirmation.
Once the transaction is confirmed, the transaction ID can be retrieved from the "Copy Transaction ID" button.
The transaction details are also prompted in the REMIX terminal.
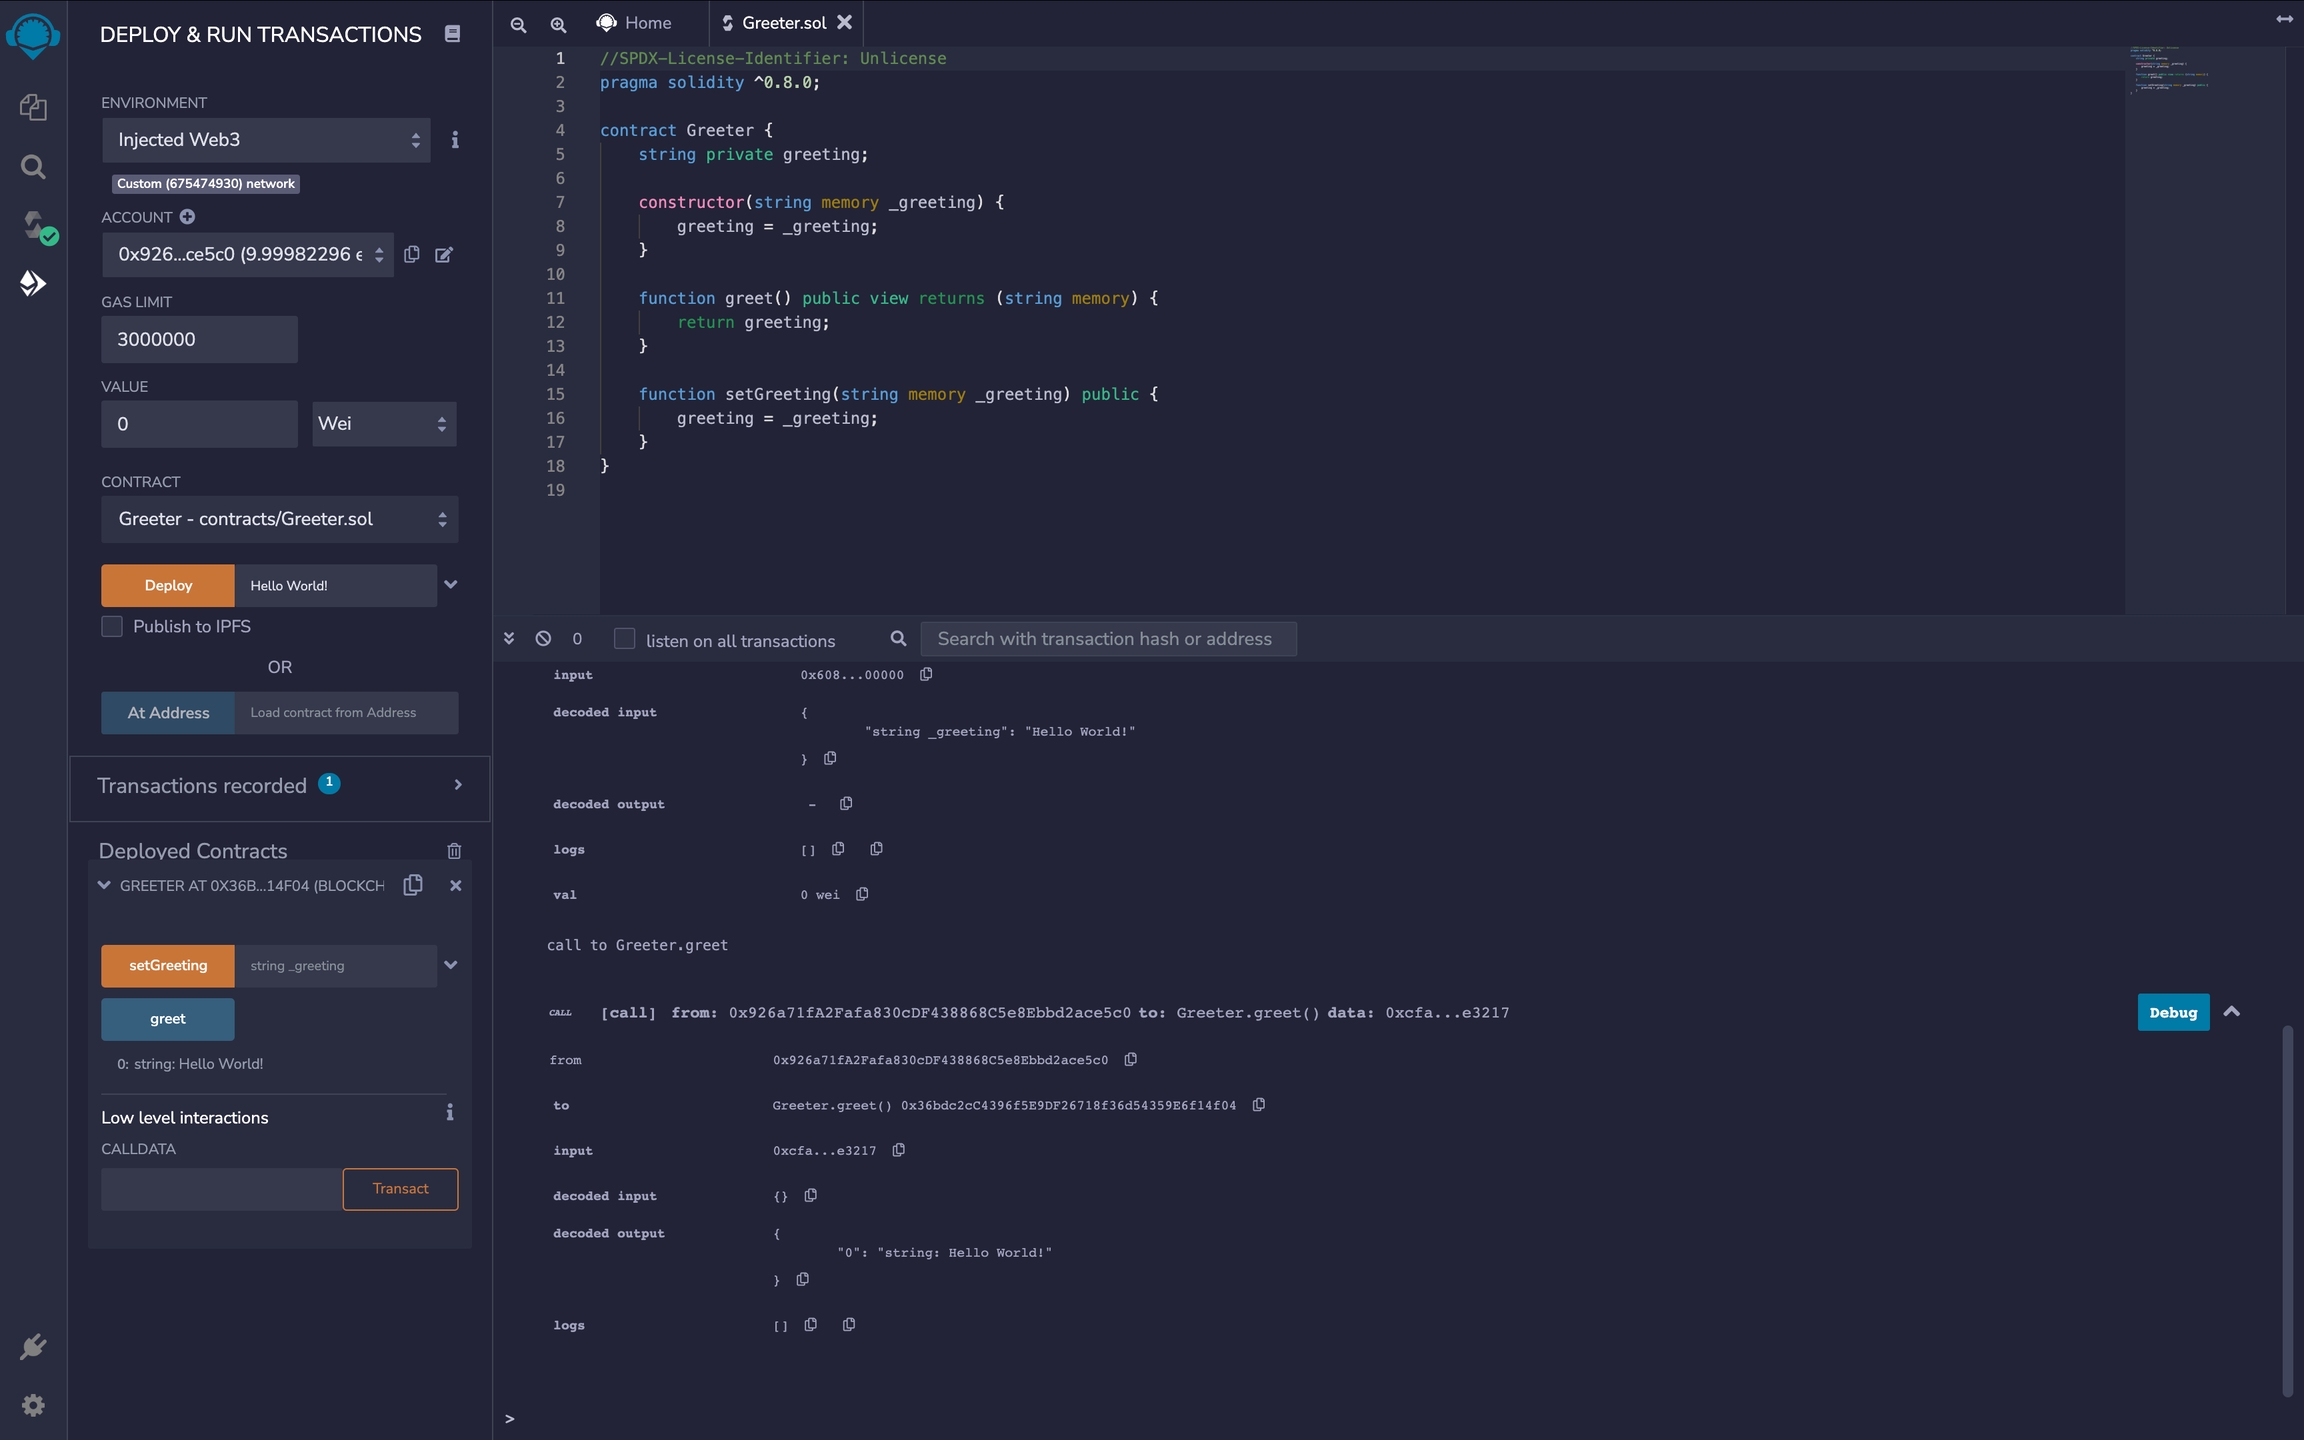
The "Deployed Contracts" tab in the bottom left corner shows the deployed contracts list. From this tab, it is possible to interact with the smart contract.
For example, to change the greeting returned from the smart contract, enter the new greet into the setGreenting method and then push the setGreeting button. Another transaction will be required to be approved, and then after the confirmation, the new value can be checked from the Greet button.
Last updated